Showing posts with label DIY. Show all posts

Sunday, July 24, 2016

painting copycat

I love to paint, but I always have problems coming up with my own original designs. Instead of purchasing prints or expensive paintings I like to try my hand at recreating them. Before you look down on me for using others' designs, I want to tell you I'm not selling anything nor do I claim to be as great as they are. I just enjoy the process and so I wanted to share a recent painting I did based on a print I saw on Etsy and Anthropologie.


Forgive the poor lighting, this was intended to be a tutorial but I didn't know what the heck I was doing so....here's just the process.


 I've also recreated this Anthropologie bird (you can see my recreation in this post - I'm most proud of this recreation! haha) Check out some my other DIY paintings here and here.

P.s. how cute is this painting Jake made at a work function (the same week I was painting this) at one of those "wine and paint" places. 


Monday, June 13, 2016

hair coloring at home - gasp!

I don't know if you've ever had the urge or guts to try your hand at coloring your hair at home, but every so often I dabble with it. Don't get me wrong, I think professionals do a much better job and I prefer to visit them, but every so often I just want a "quick fix" of color and this comes in a box at the drugstore. 

I've tried a few methods over the years. I've made mistakes, I've made messes, and I've learned some tricks for getting the best result with these at-home hair color kits. From not knowing what I was doing and just flopping it on to having my friend  (daughter of a hairstylist) comb the color through the hair each tiny section by section in college one night (this method worked well but took the longest) I've come a long way. 

So here are my tips for coloring your hair at home :

1. Don't buy permanent color .  
"28 washes" is plenty. When you buy permanent color your hair grows out and the color stays on the dyed part of your hair leaving you with two distinct colors separated by a line where the old dye ended. As this gets longer a line has formed in your hair. When you dye over it the next time, the top half (your real color) will dye one color and the bottom half (the leftover permanent color from last time) will dye another color and the line will still be there. 

If you use the "28 shampoos" hair color it will begin to slowly fade by 30 washes and by 6-8 weeks it will be your normal hair color and no one will notice. This is much more natural.  Lengthen the color by using a shampoo for color treated hair and don't wash your hair every day (hello dry shampoo) and it will last longer then that - trust me.  Clairol Natural Instincts is the only brand I've found at my local drug stores that is not permanent.  (The shade I used today is 31 Darkest Brown)


2. Be aware of what "W" means on the box if you get a W color
"W" after the number means it will tint it red -warm. (it's a box dye, this will get brassy eventually). I used to like the warm (W) tones but only when a hairstylist does this, my hair turns red tinted quick whenever I get a box with a W on it.

3. Section your hair off
Section your hair into pieces, twist the section around your finger, and stick a bobby pin in it to hold it.


4. Follow a process

Go around the entire hairline first

Next cover the roots so the color is even and you don't forget any pieces-  this step is easy because you sectioned your hair off so you can just flip through the sections and massage some color around each part you made.

Now go section by section and cover the length of the hair with color on both sides of your section (front and back), and don't forget the ends - Get the ends full of color! 


(side note: you can see some of the "brassy" leftovers from an old box dye - from months ago in the first image below)


Ta da! 

Yes, it still looks like a box dye, but that's what I expected and overall this went on easy and evenly! 


(BTW I'm moving in a couple weeks and studying for a huge exam - ignore my messy office)


Wednesday, August 12, 2015

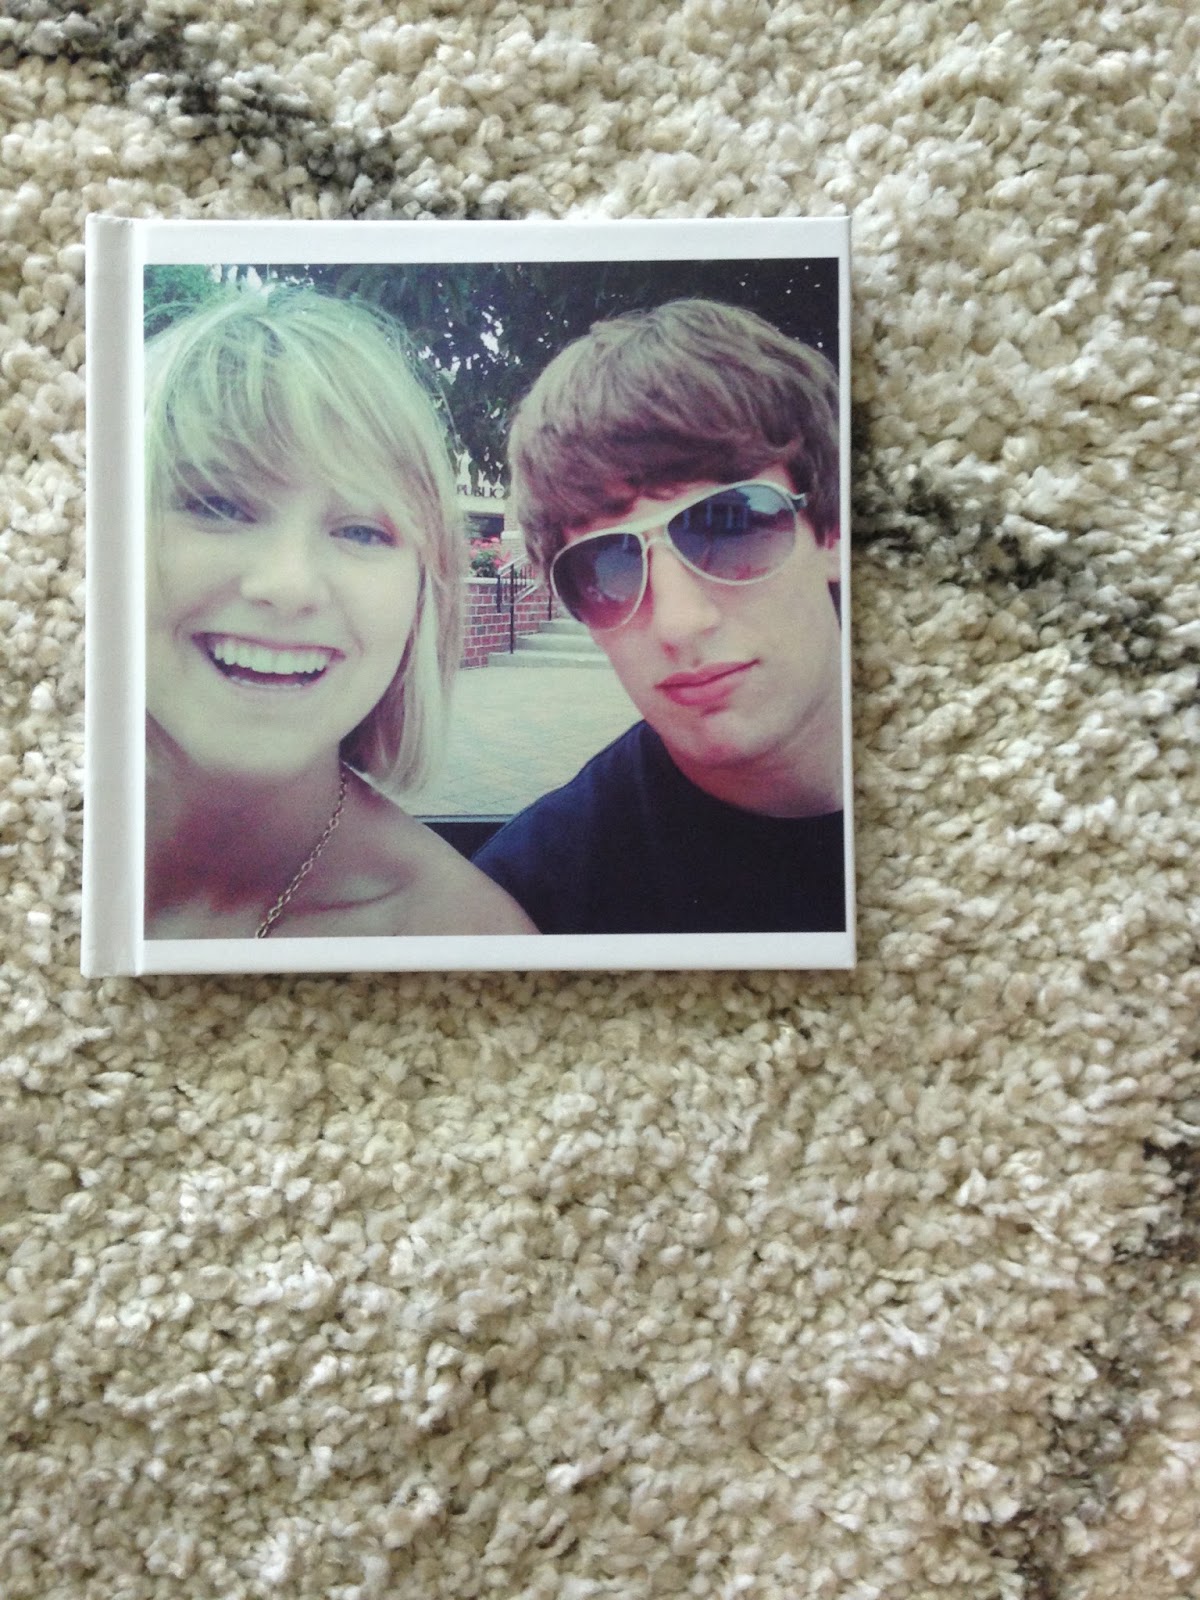
instagram photobook

best instagram photobook


I've been wanting to make a book out of my instagram photos for a long time. The captions and photos remind me of some really good memories that normally wouldn't be printed in a photo album. 

For my project I considered Blurb, Shutterfly, and Artifact Uprising. Artifact Uprising was the highest recommended in terms of image quality for at-home instagram photos, but they were also the priciest and their "instagram book" was soft cover which I didn't love. You could select hardcover and choose the smallest book, but in the end I decided against it. Artifact Uprising does have some really cool photo projects on their site, I especially think this wood calendar would be awesome to make. 

In the past I've ordered an engagement photobook from Shutterfly and I deeply regretted this decision as soon as I saw how awesome my wedding photos turned out in my Blurb book. The colors, printing, and page quality turned out ten times better on Blurb (and even better, of course, on the album my photographer gave us from the fancier printing place!) The main reason I considered Shutterfly for this book was because my iphone and blackberry photos weren't that high quality anyway, but in the end I ordered from Blurb.

I always wait until there is a sale when ordering photo books since I don't need them right away. I got this book when Blurb had it's 65% off sale in June.

To design a book from blurb you have to download software called BookSmart from their website, but it's really easy to use. 

I ordered the small square (7"x7") and with that selection you can import photos directly from Instagram or Facebook by logging in. I chose the standard paper for this little album but I've used their Proline upgrade for the wedding book and it's excellent. I would not go bigger then 7x7 for instagram photos because the image quality would get terrible if some of my phone images were blown up any larger. I had 200 pages.

best instagram photobook


blurb instagram photobook review


With inspiration from Kim K's Selfie book, I thought it would be fun to write my own captions.


blurb instagram photobook review

best instagram photobook review


I'm very pleased with how this book turned out, in another three years I'll make a second volume!  

best instagram photobook review


Currently I'm working on another Blurb album of some vacations we've taken. 

Also, Websites like TinyPrints turn instagram photos into pretty postage stamps and Social Print Studio has some really awesome stickers to make from photos too! 

Wednesday, June 24, 2015

diy washi tape page flags

I made these easy page flags yesterday, and I love how they turned out. Grab some washi tape and some paperclips and you can spice up a planner, textbook, journal, notebook, or recipe book.

diy page flags

Make two cuts in the middle of the tape to fit the paperclip.

diy page flag

diy page flags washi tape

planner diy page flags washi tape

planner diy page flags washi tape

planner diy page flags washi tape


Sunday, May 31, 2015

perfume bottle watercolor

I've been wanting to try my hand one of these watercolor prints for a while now, and after two attempts I came out with a product I'm satisfied with. The professional ones are still better but it was a fun process.

I copied my sketch off of a perfume ad from a magazine.


My first painting I smudged the letters when I attempted to erase some pencil marks and I couldn't live with it so I whipped up another one. However, I liked everything else about the one I "ruined," I especially liked the purfume lid better on the ruined one! They didn't take too long to make though.


It's by no means perfect, but it hangs in our bathroom and looks pretty nice.


Wednesday, April 1, 2015

spring ideas

I love Easter time, and I have many fond memories sleeping in foam hair rollers the night before church, putting on a pretty dress that matched my sister (complete with an itchy hat-which look adorable in photos), waking up to find what treats the Easter Bunny had left for Anna and I, hunting for eggs around the house, dying eggs each year, and spending time with family that we didn't see too often. 

While you remember the real reason for the season, here are a few ideas to also celebrate spring. 


1. Dye Eggs

Last year I made some cute ombre eggs (found here), and in a weak attempt to top that I made these "watercolor eggs" that turned out sort of ugly. Since I did this as a quick study break, I just used food coloring, boiling water, and vinegar, and I couldn't figure out how to make pink dyes. Originally I intended to do pinks, yellows, and oranges as seen in this post. 

watercolor tie dye easter egg

This could be a fun twist on traditional egg decorating if you are stumped for new ideas. The trick is to prep the eggs with vinegar and water beforehand, then take a spoon of light colored dye (watered down dye) and drizzle it over the egg.  Wait for the color to dry, and do another light color . For every dark color dye I made a watered down light color also. 

Then add darker colors on top one at a time. Just be sure your colors dry in between layers...or they will look more like the bottom three eggs in my picture - kinda messy but who cares.

tie dye watercolor easter egg


For the egg prep: 1:1 mixture vinegar and water; wipe eggs with it, then dry them
For the dark dye: 20 drops food coloring + 1/4 cup boiling water + teaspoon vinegar
For the light dye: 10-15 drops food coloring + 1/8ish boiling water + teaspoon vinegar 
(since I was only grabbing small spoonfuls of the dyes I didn't need much water)

These were last year's eggs, click here for more, including Jake's eggs. 

ombre easter egg

2. Bake Something Sweet

Last year I also made these delicious mini sugar cookie sandwiches (check them out here). 

spring sugar cookie sandwich


Sunday, September 7, 2014

filofax excitement


I ordered a beautiful planner a couple weeks ago and have finally had some time since the exam got over to get started decorating and planning out the next three weeks (before the next exam). If you haven't heard of filofax (I hadn't until I saw about it online and became hooked), they make quality leather bound planners in a variety of sizes. I ordered the personal size in the "patent fuschia". 

I began looking for a new planner when I realized that my daily "to do" lists were getting out of hand. My personality requires that I have an idea of what I'm going to accomplish in a day, and normally my mind has sufficed as the filing system for that info. Since I've had to put an insane amount of information into that mind lately, I've been in a constant frenzy the last two weeks. My old planner was simply not large enough, not easily organized, and I needed something more specific for day to day use. 

"One does not plan to fail, they simply fail to plan."  

That is such a great quote. Set a goal, and write down how you will achieve that via planning the specifics.  

Here she is in package:

new personal filofax review fuschia


(those scratches are just on the plastic, don't worry)


new personal filofax review fuschia

new personal filofax review fuschia


All you have to do is google filofax ideas and tons of decorating and organizing ideas will pop up. Thanks to a great gift card, my used crafting stash, and a little post exam reward I picked out all of my favorite supplies to use first: 

planner ideas new personal filofax review fuschia

planner ideas new personal filofax review fuschia

planner ideas new personal filofax review fuschia


planner ideas new personal filofax review fuschia


Complete with sparkly tabs of course.


planner ideas new personal filofax review fuschia

One problem I've had is that the planner came with weekly planning pages for 2015, and so I ordered (through amazon) some pages for the remainder of 2014. TWICE they sent me the wrong layout in the wrong SIZE. So, I returned them both, and decided to just order the sale Kate Spade refill pages for 2014, hopefully those will be in this week. Until then, I just decided to quick draw up my own pages.


planner ideas new personal filofax review fuschia

I even started my first to do list (it's all color coded of course - we'll see how long that lasts)....I hope this list will be long enough once I'm hit with a ton of things tomorrow :) . 


planner ideas new personal filofax review fuschia

I used that back note page for some weekly inspiration. 

planner ideas new personal filofax review fuschia


Blog Design by Get Polished